


Adventures in Caking
We are so excited to be able to celebrate the 50th Wedding Anniversary of my Aunt and Uncle this week! And what better way to do that, then with sweet sweet cake.
I (Jill) was in charge of designing and decorating a cake to feed approximately 60 people. This is my very first “professional” cake that not only needs to look great, but taste great as well. I’m not a pro by any means, but I do love a challenge, especially one that involves art, creativity and food!
My adventures in caking began early this year while we were in Calgary. I took a couple of cake courses that got my feet wet into the world of caking. What better way to test out my [lack-of] knowledge than with a project. This is the story of my cake week.
Day 1: Monday
Planning a cake of this magnitude doesn’t happen in a day, or even a week. I actually spent about 2 months ahead of time, acquiring many caking tools and learning as much as I possibly could…not to mention, practicing my flavors on many test subjects and test-cakes. Thankfully I have a lot of liberty on this cake, which is perfect for a first-timer like me.
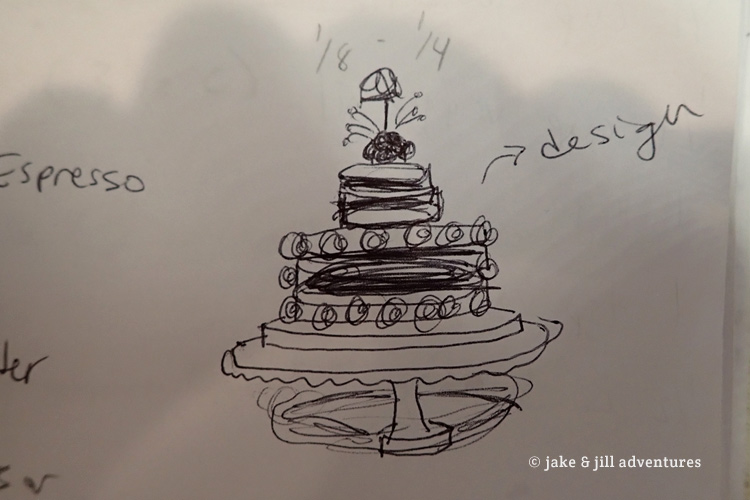
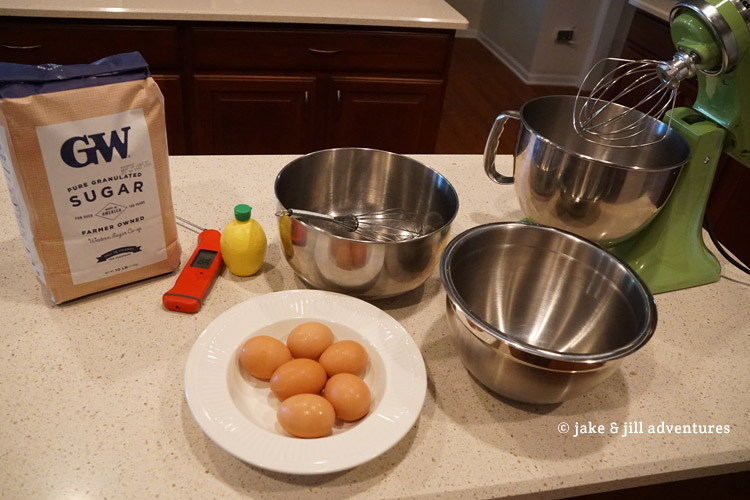
Even with a semi-solid plan, I really didn’t know how to approach this process. I decided to attempt and take it slow. First thing was gathering all of my materials and then planning my design, flavors and schedule. I jotted down some ideas and even developed a more detailed visual for the initial concept. When it came to flavors, I had a basic idea for what I wanted, but hadn’t yet nailed down an exact recipe. My previous cake experiments were never quite right (under-baked, flat merengues that didn’t set up, too much butter or sugar, not enough flavor, etc). So, this time around, I really wanted to get it right.
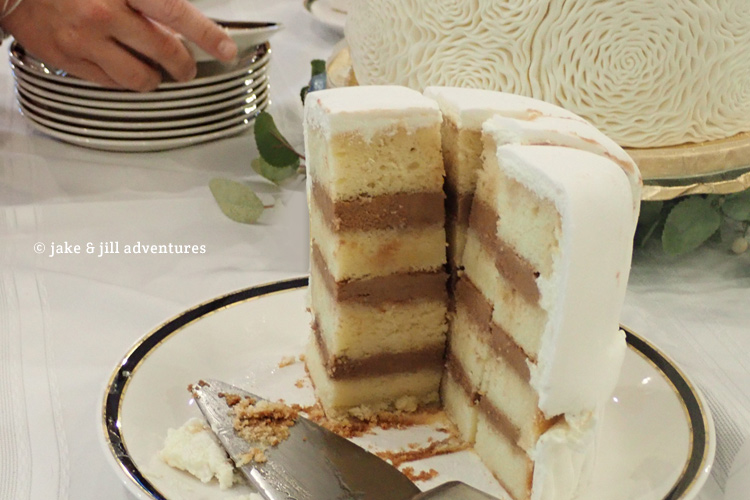
Flavor profile: cherry-infused almond white cake with a mocha espresso buttercream filling, almond swiss-merengue buttercream icing and marshmallow fondant (for decoration) and gumpaste flowers.
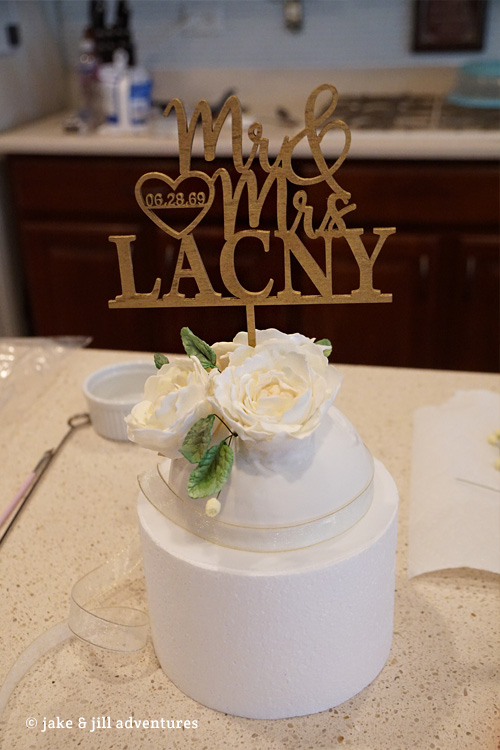
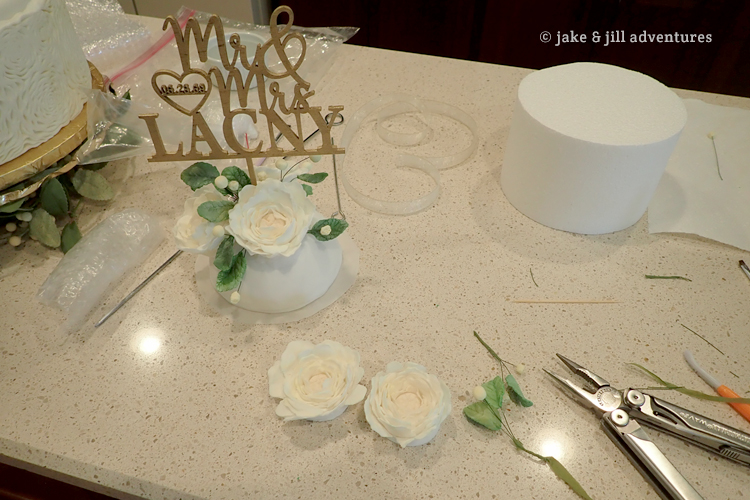
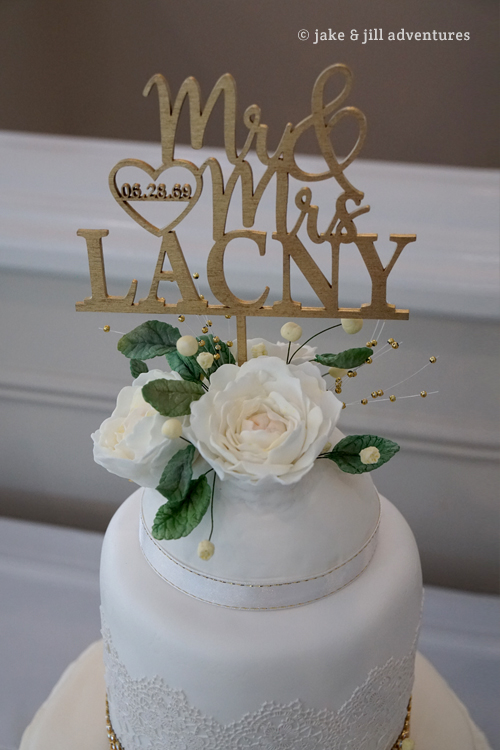
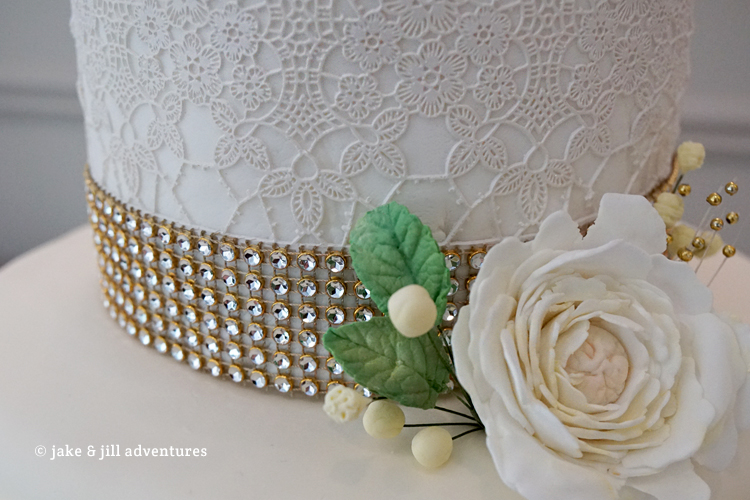
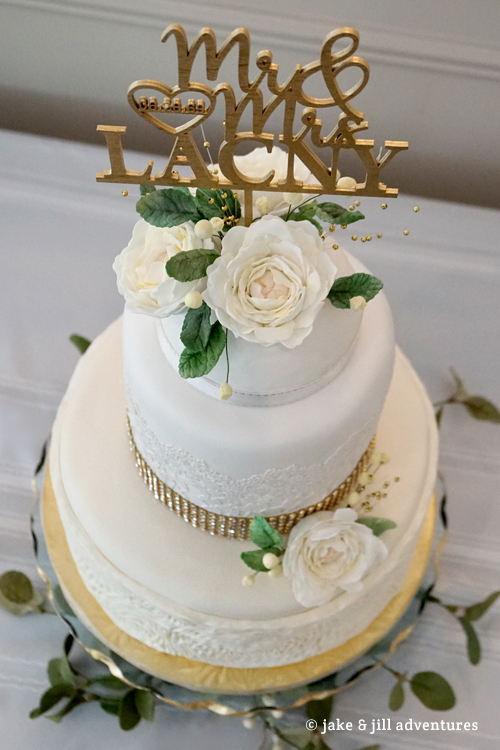
Design: 10″ x 4″ cake and a 6″ x 6″ cake, and then a custom topper. I also knew that I had a centerpiece green-garland that I would to wrap around the bottom of the cake stand, and would also use for color inspiration of my floral elements. The colors are cream and gold, for a 50th Wedding Anniversary. I really wanted to try a few design techniques that I have seen on caking shows and in my courses. One of those is quite popular where you use fondant to make a ruffle pattern that looks like a chiffon dress. I would do this for my bottom tier, with an subtle ivory-color. And then the next tier would be the “bodice” of my cake dress, with an edible lace pattern and some beading to match the centerpiece. The top will be a bouquet of sugar flowers. I also had a custom wooden sign with my aunt and uncle’s last name and wedding date fabricated and painted gold.
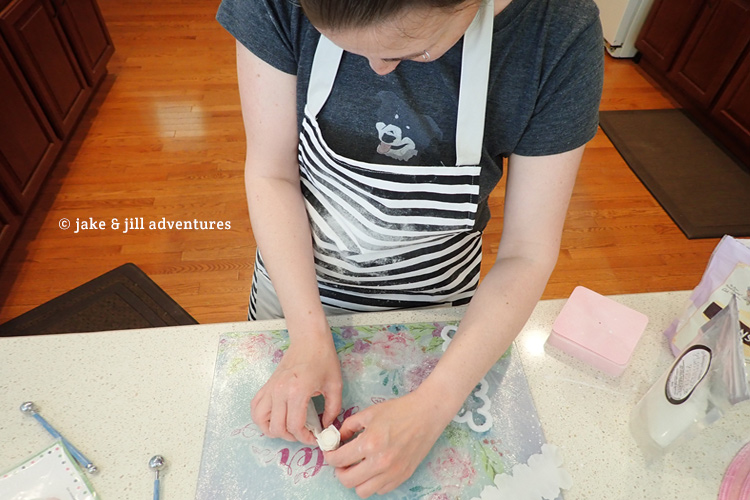
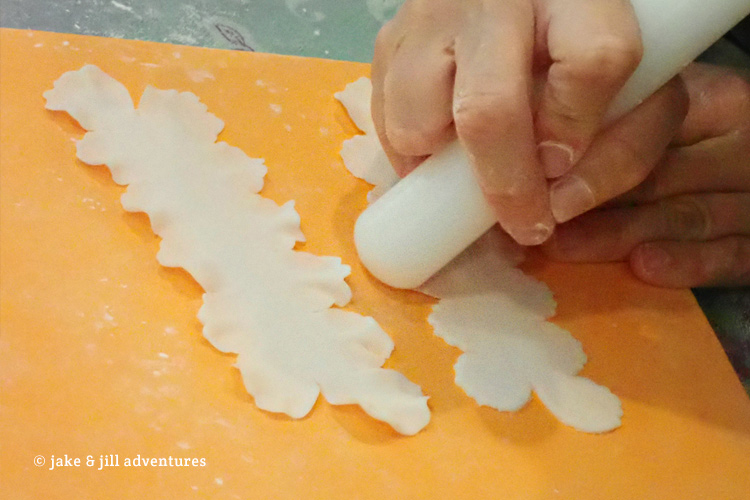
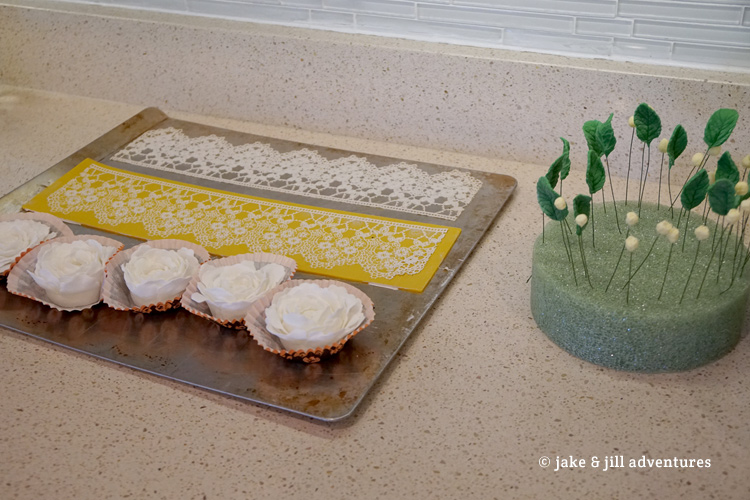
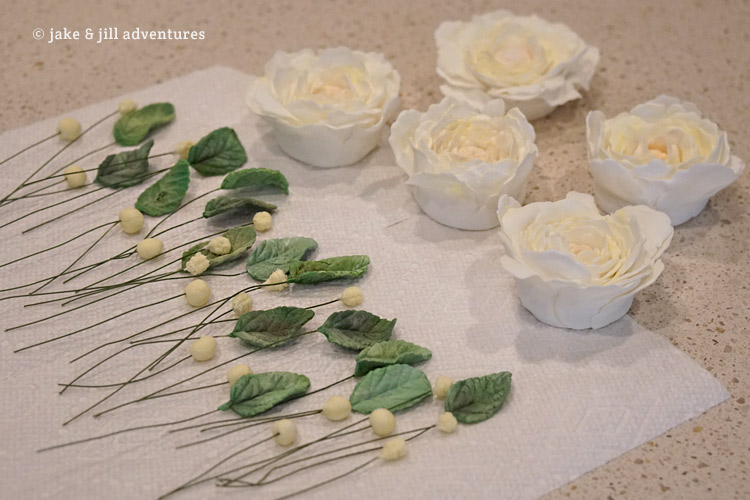
I chose to start small, and work on flowers for the day. I’ve only ever built 2 of these in my cake career, one being a very small yellow rose and the other a large magnolia. I chose to stick with one flower, this time a peony. I found a handy little flower cutter and a great tutorial which helped me to work through to getting my peonies to look real. My gumpaste was special-ordered from the UK, which has some of the best cakery products in the world. This stuff smells amazing (like fresh lemon) and is very easy to work with.
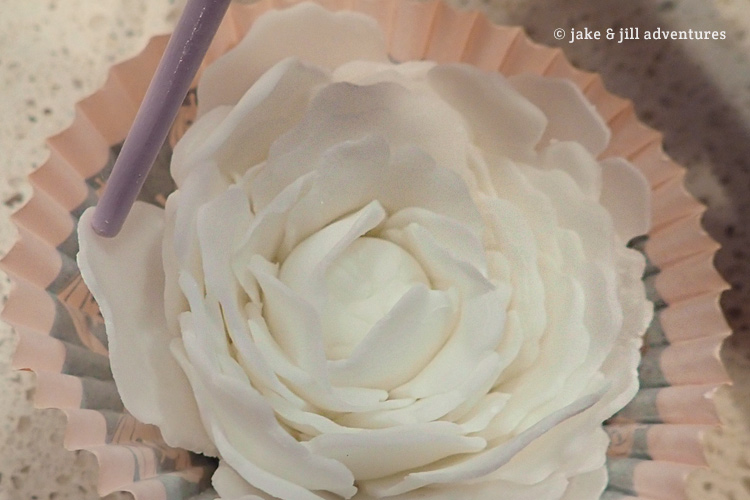
It took me hours to complete 5 medium-sized flowers. I would have done more, but I was running very low on the materials and didn’t want to run out in case I needed extra for emergency.
I also worked on getting my lace for the top tier in production-mode. This is actually a very easy thing to do, with a silicone mold and a pre-made mix (though you can make your own). Since this is my second time working with edible lace, I wanted to keep it as simple as possible. The only problem is that I need 2 batches to fit around the entire cake, and each batch takes 24 hours to make. Good thing I’m starting early!
After 7 hours on my feet I felt pretty good about my progress. I didn’t think too much about how I was going to attach the flowers, which I probably should have thought about. Oh well! They came out nice and yet I still think there needs to be something else…maybe some greenery or filler flowers?
Day 2: Tuesday
I contemplated how to assemble the top bouquet all night long, without any revelations. So, I just kept plugging forward; batch #2 of edible lace. Batch #1 came out perfect.
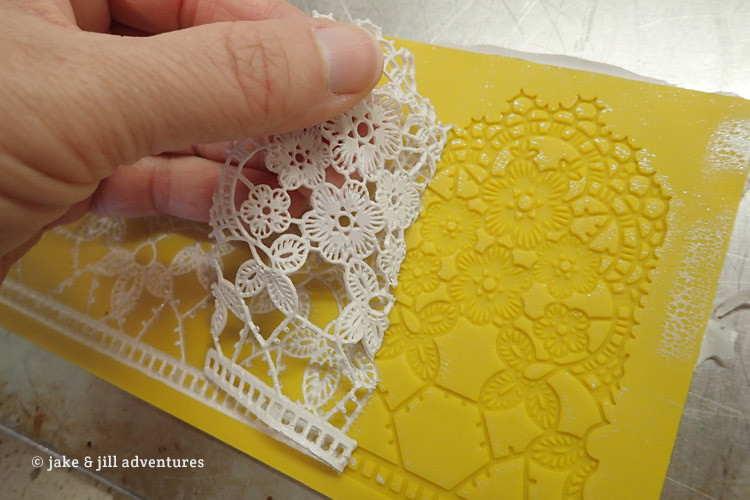
The kitchen was getting very crowded with all of my different stations taking up so much space. In an effort to organize this a bit, I decided to store all of the decoration pieces in an out-of-the-way location where they could be left to dry and harden and without the risk of getting trampled by all the activity. I decided on the bottom oven. Unfortunately I completely forgot about it when making dinner that night and using the top oven to bake, from which the heat seeped into the bottom and managed to fry my second batch of lace…which really just means that it turned a slight shade of yellow and was brittle. I could have made a new batch, but at this point I really didn’t want to bother and figured I could hide it in the back.
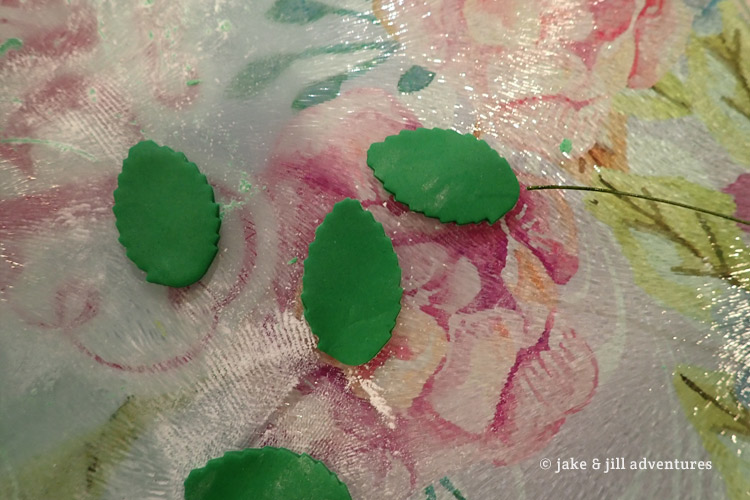
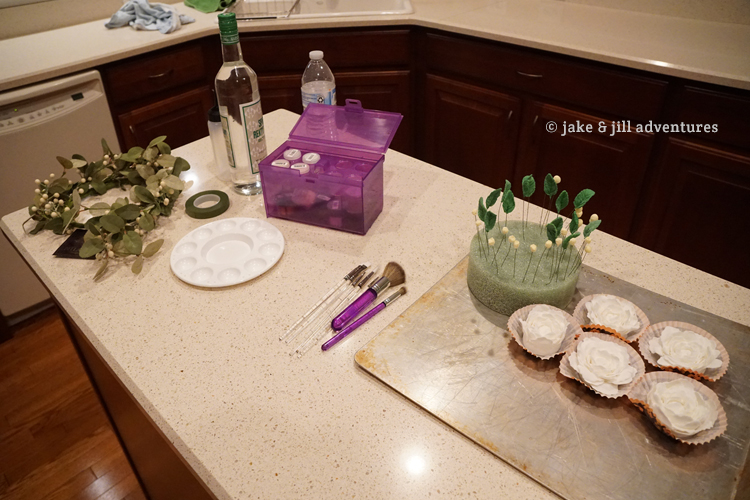
I also think that I should add more to the bouquet than just flowers. It needs color and greenery. I want it to match the centerpieces, which have a ring of green leaves and some ivory buds. In an effort to save myself some time (and save my good gumpaste), I purchased some pre-made stuff that was already colored green; albeit an artificial-looking color. I could paint them to look more natural once the shaping and drying is finished.
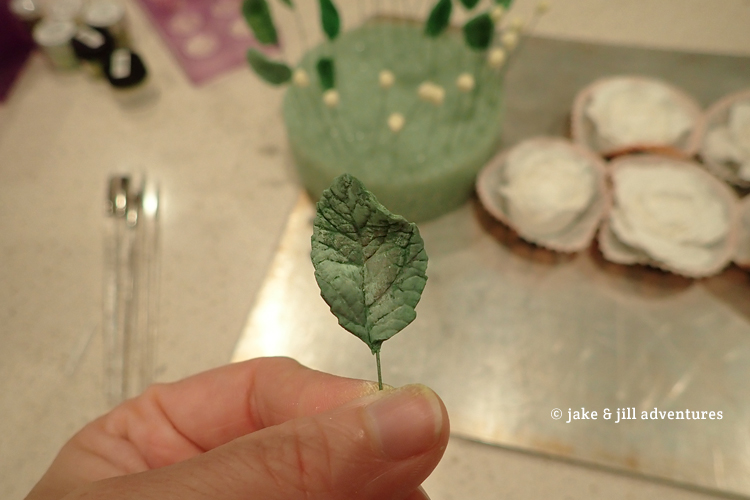
Right off the bat, I could tell this gumpaste was far less superior to the UK brand. It was very gooey and fell apart too easily, making it difficult to add wire stems to the leaves without breaking. I spent so much time trying to fix and vein (which I had to cut by hand) that I wasted a good portion of the day fumbling (and swearing a lot).
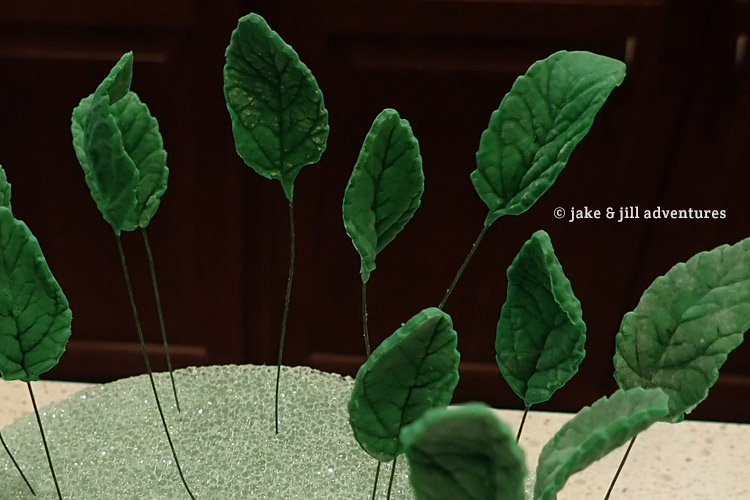
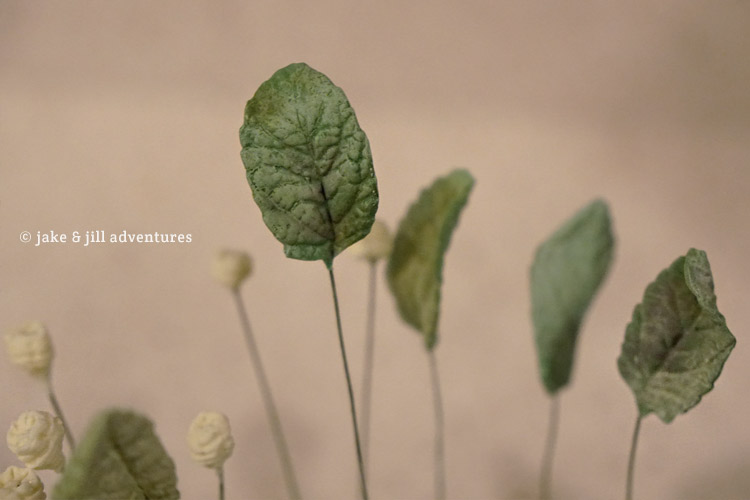
I finally managed to get a good batch complete. I also made some small buds and baby’s breath with the UK brand and that was far easier to work with. The leaves looked great after putting them through the veiner.
Day 3: Wednesday
Its baking day today! My plan was to get all my cakes baked and cooled 4 days before the event. I prepared a massive batch of the “master baking mix” a few weeks ago, which is the foundation for any flavor of cake. Its a tedious thing to make (because you have to use butter at just the right temperature) so I was glad to have it ready and waiting for me.
The cake recipe that I’m doing today is almond and cherry-infused white cake. I will start with marzipan, which is an almond candy paste. Through experimentation, I’ve learned that the best way to incorporate this product is to pulverize it in a food processor before adding to the mix. I added the wet ingredients and a few additional flavor points and then turned on the mixer, low and slow. It is VITAL to not over-mix the batter, or the cake will deflate, which looks terrible and causes large cracks and uneven baking.
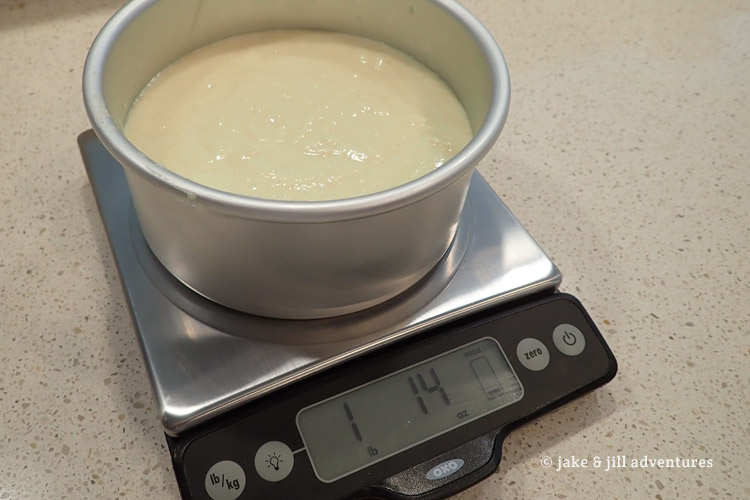
Since I’ve never made a 10″ cake before, I didn’t know how much batter that I would need. Turns out one batch filled the pan perfectly, and now I know I’ll need at least 3 more batches…maybe 4? I used a scale to measure the weight of my batter so that I could keep it consistent with each pan and hopefully every cake will be uniform. Once the first cake went in the oven, I set a timer for 45 minutes, not completely sure how long it will take. I left it alone other than turning it once after 20 minutes of time. Then I checked it at 40 minutes to see that it was done. Any longer and it would be ruined…so that was really lucky!
Jake was a great sous-chef and support for this whole day (and the entire process). He would go to the store to get me any extra ingredients I needed, do the dishes in-between most baking sessions and even help me pull together my cherry glaze simple syrup – made with fresh cherries, granulated sugar and water.
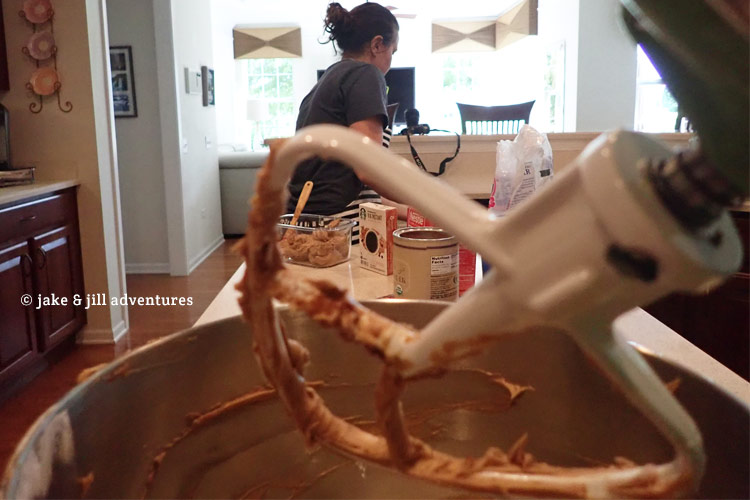
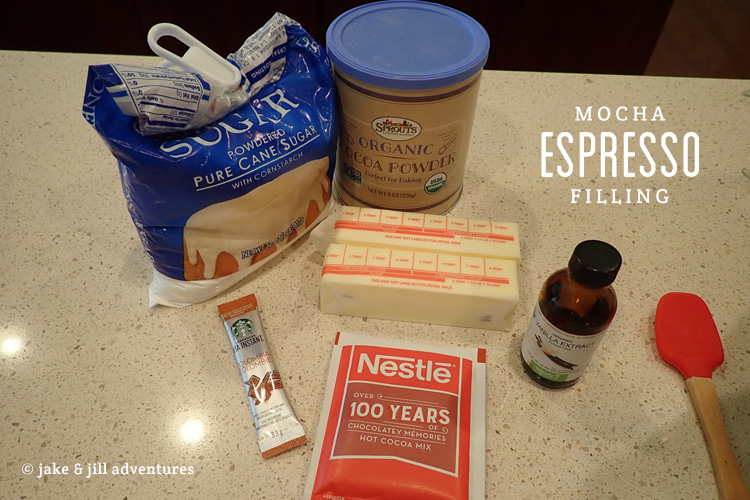
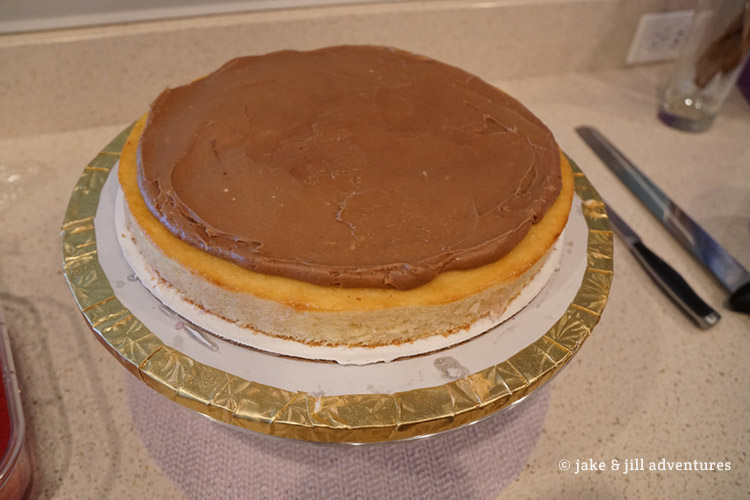
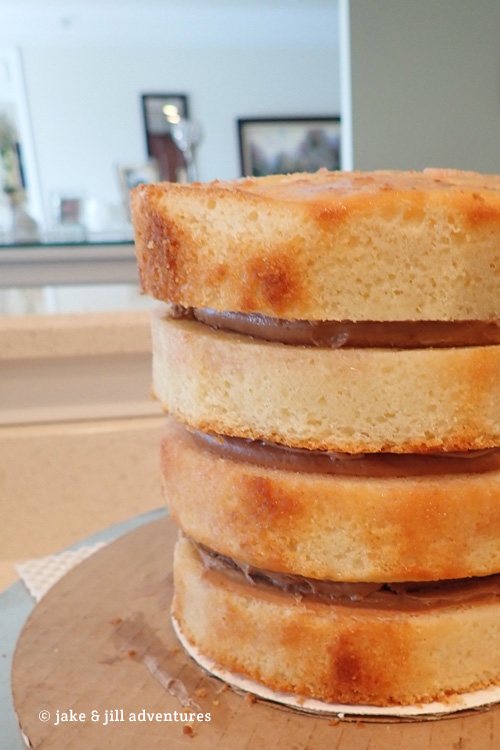
Now I could have stopped here and called it a job well done. But I also thought that I still had some energy and maybe I could get ahead of the game by preparing my filling. I wasn’t exactly sure how this recipe would look. In my test-kitchen, I found that previous fillings of chocolate would overpower the flavors of almond, so I wanted to take that down a notch. I also wanted to incorporate espresso, because I think it will pair well with cherry and chocolate. So I opted to use hot chocolate mix and a tiny bit of cocoa powder along with instant espresso mixed with a tiny bit of hot water – to make a syrup. With my dad and Jake as my taste-testers, we came up with a perfectly balanced filling with subtle hints of espresso and chocolate, butter and vanilla.
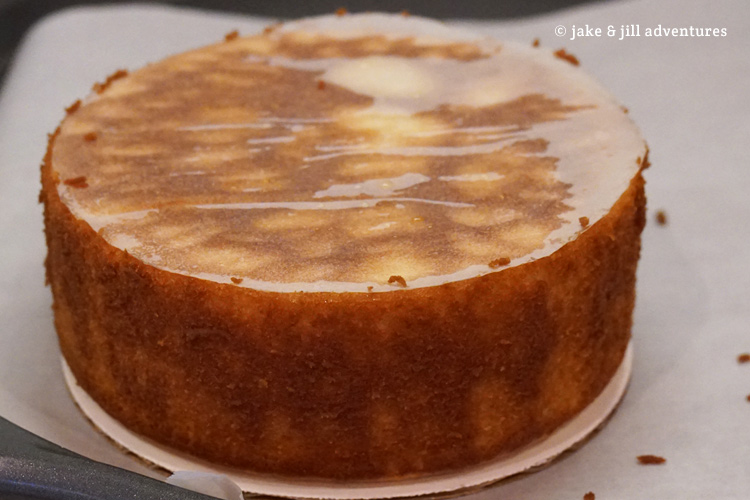
I think I was on my feet for over 13 hours today. It was a long day but I learned a ton and ended up with perfectly baked, level cakes and a big batch of filling.
Day 4: Thursday
I dreamt of nothing but cakes last night. Baking and torting and filling and decorating.
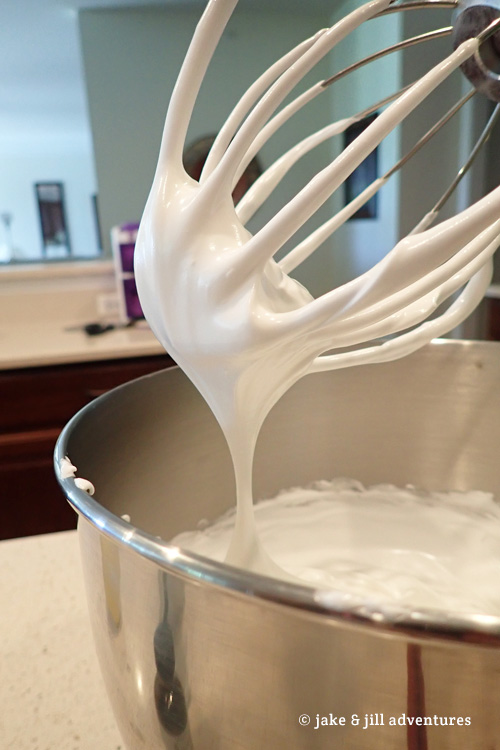
My body was feeling tired today and my brain was on overdrive. Its starting to get real now, with only today and part of tomorrow left to finish this massive project. I didn’t waste any time and focused on getting my swiss merengue buttercream icing in the queue. For those who don’t know, swiss merengue buttercream (SMBC) is one of the most delicious, yet finicky recipes to get right. Its basically 3 ingredients: egg whites, granulated sugar and butter.
The challenge is getting the merengue to setup and avoid scrambling the eggs. I’ve managed to botch this recipe every time I try it, mostly due to lack of proper cooking equipment. Its different now that I have access to all my gadgets and I’ve prepared everything with the necessary treatment. Most important with any merengue is de-greasing every surface that the eggs come in contact with. Grease kills merengues. Using stainless steel and lemon juice combats this every time. Some people even wear gloves to avoid any hand-grease contamination. Once I separated my whites, I added the sugar to the bowl and then put on a double-boiler to heat my eggs while constantly mixing them. The goal is to get them up to about 142 degrees F to kill any bacteria. But it also means that the sugar is fully incorporated, which is imperative for the merengue to set. Once complete, I dumped the mixture in the stand mixer and turned it on high for 4 minutes.
My merengue was PERRRRRRFECT. It was so soft, cloudy and with a subtle almond flavor it tasted like heaven!
The initial recipe was too small for this project, so I did a double-batch on the first go, hoping it would be enough…But after seeing the result, I know I need another double-batch.
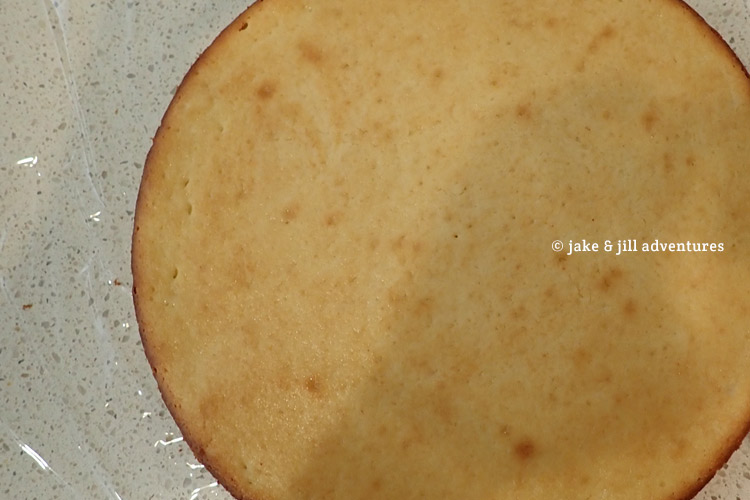
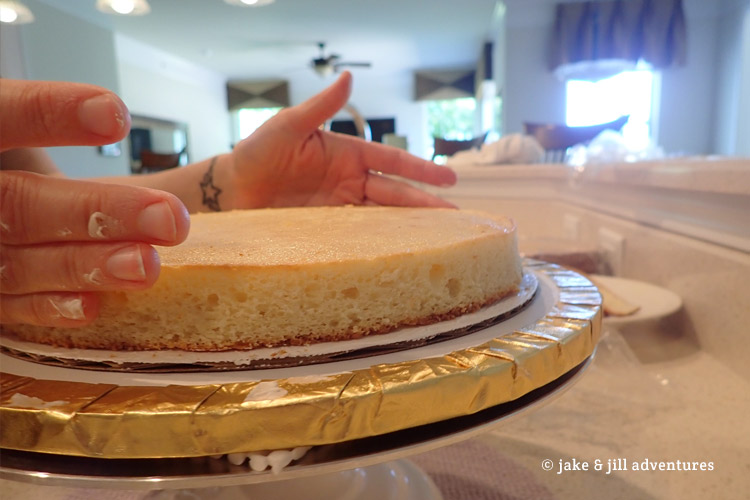
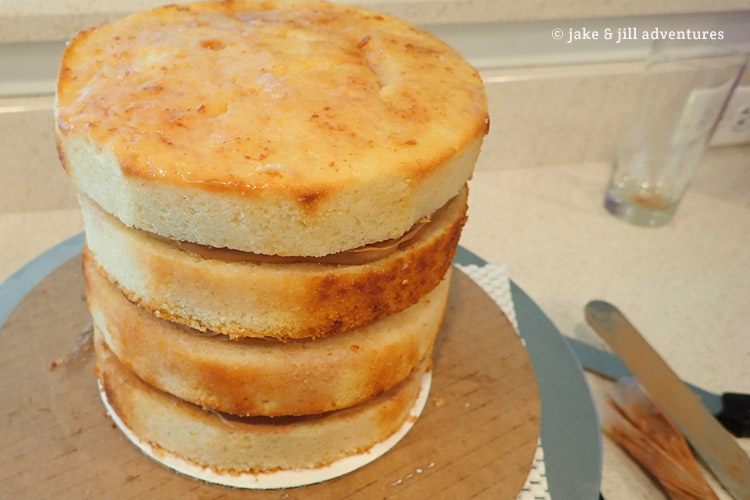
Once the cakes cooled and my SMBC was finished, I was ready to begin assembling. I had everything all set and ready except my filling, which I completely forgot about in the fridge outside. It was hard as a rock (which happens when butter is cold) and so I needed to get it down to room temperature in order to work with it. Jake had a brilliant idea to put it outside in the 85 degree sun for a few minutes, which worked like a charm. In the meantime, I got my cherry syrup and began cutting the dark edge off my 3-10″ cakes, to make sure every part of the cake is consistent.
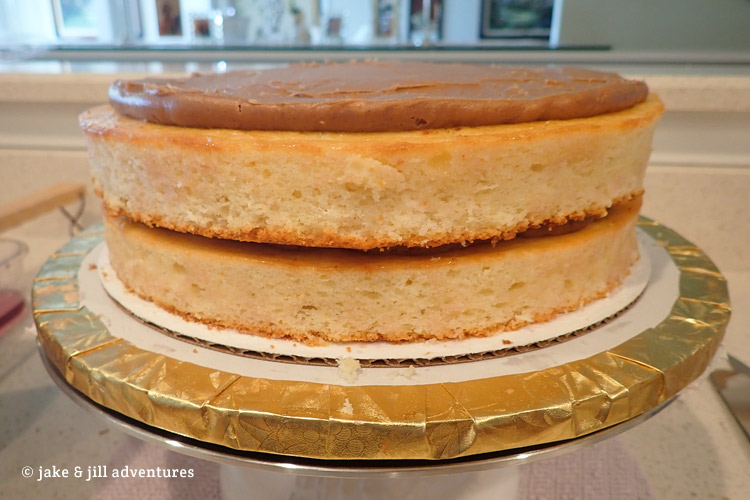
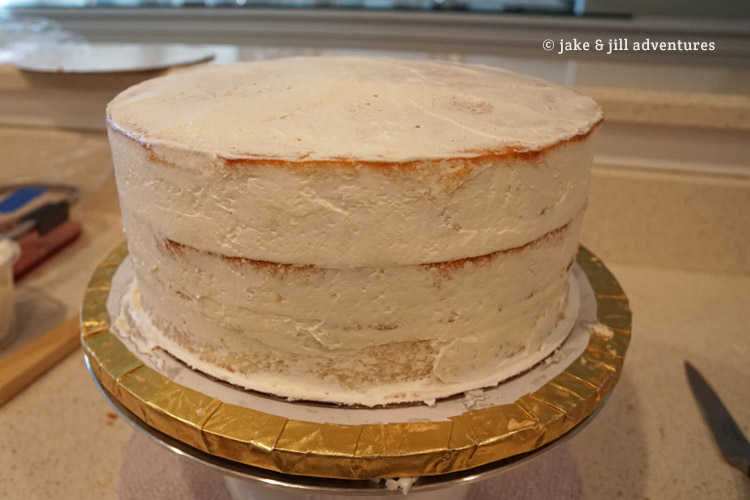
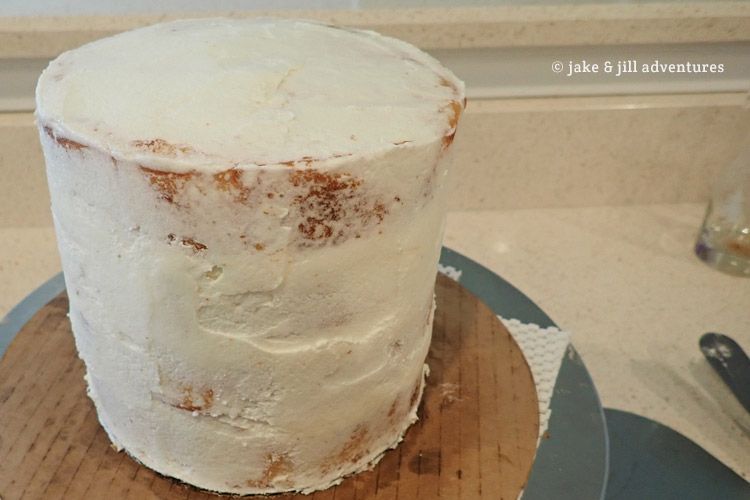
Time to build…starting with a single 10″ layer, I painted on the cherry glaze. Then I took some of the filing in a piping bag with some powdered sugar (to make it thick) and drew a dam around the outer edge. This will keep the icing from spilling out and hopefully keep the layers consistent. Then a second layer of cake, glaze, filling and so on. Once the final tier was complete, I covered the entire thing with a thin crumb-coat of my SMBC icing. I made sure to fill in all the gaps and cracks so that the cake was completely sealed. Then back in the fridge for time to set.
The process was the same for the 6″ tiers, other than I did 4-layers instead of 3. My time management wasn’t the best today, and I had to make several extra batches of icing and filing to complete the cakes. At least it all turned out great and I was very very pleased with the results.
I was definitely ready to call it a night, but not before reviewing my schedule. I had labeled that I would cover my cakes with fondant on Thursday (today) as well. And though this shouldn’t take long, I know that I will need the extra time in case things don’t go according to plan, which of course, they didn’t.
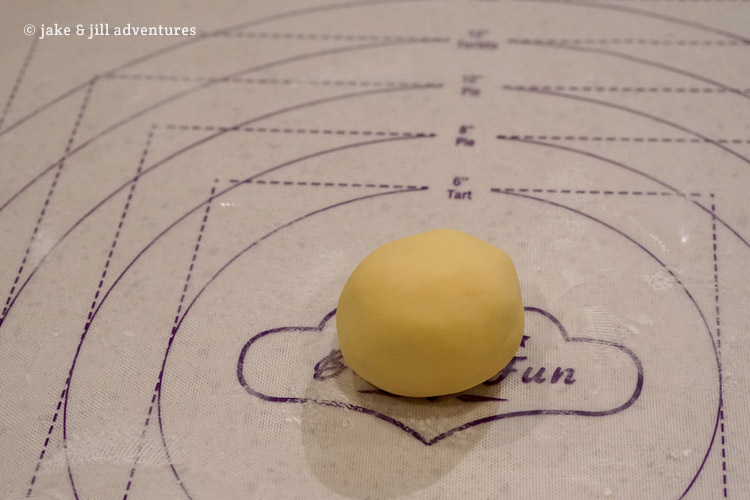
Coloring fondant isn’t particularly hard, it just takes awhile to knead it out and get the color mixed in. I wanted the ivory to be very subtle, so I took a small ball of fondant and added just the right amount of yellow, orange and brown food gel. Then I took this and mixed it with the larger batch that I set aside for the 10″ tier. I just hope I colored enough of it.
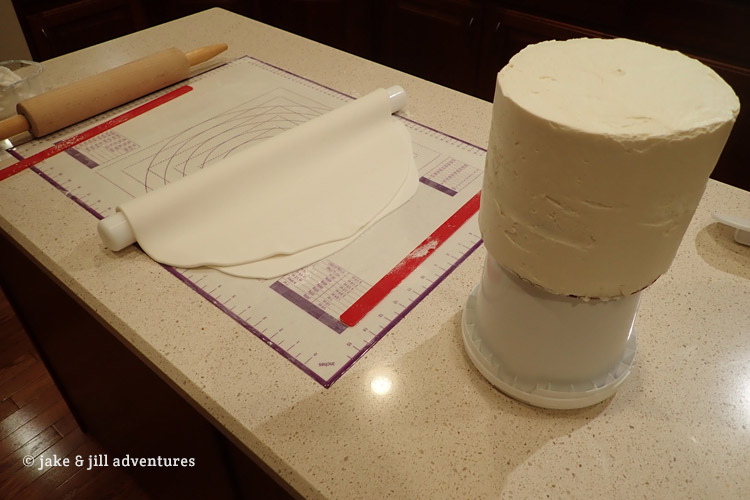
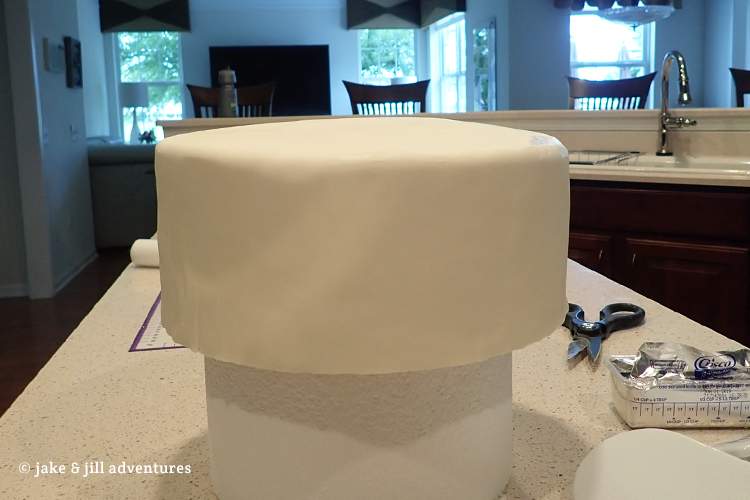
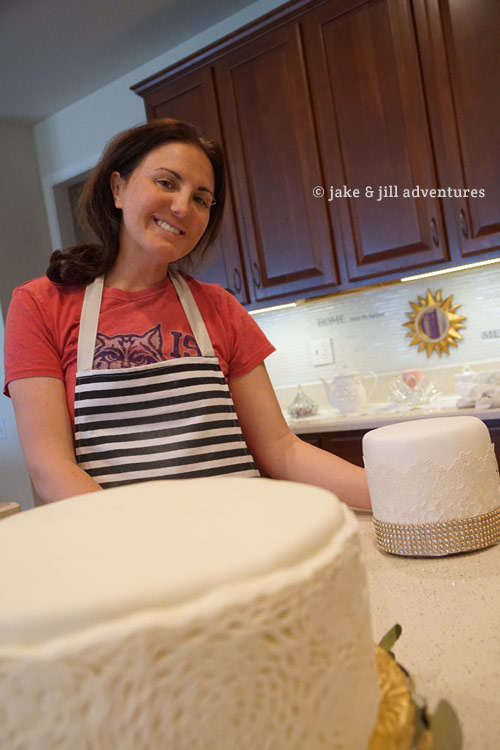
Its best to let colored fondant develop overnight so I put the colored portion aside and decided to cover my 6″ tier with white. I could tell that this fondant is not nearly as nice as the stuff I’m used to from my cake classes. Its much more sticky than I wanted so I had to use cornstarch to help. I also didn’t have the best surface to work on, and my fondant kept sticking to the counter or tearing because it was stuck. More cornstarch. Eventually I got it to the thickness I wanted and wrapped it on my rolling pin to apply…the weight of it was so heavy that it began to crack and tear as soon as it went on. I did my best to salvage it, but it just got worse and worse to the point that I just pulled it off completely. I’m not sure if its salvageable since the buttercream icing is now sticking to it, but I don’t have enough to throw this out, so I just have to go again….and again….and again.
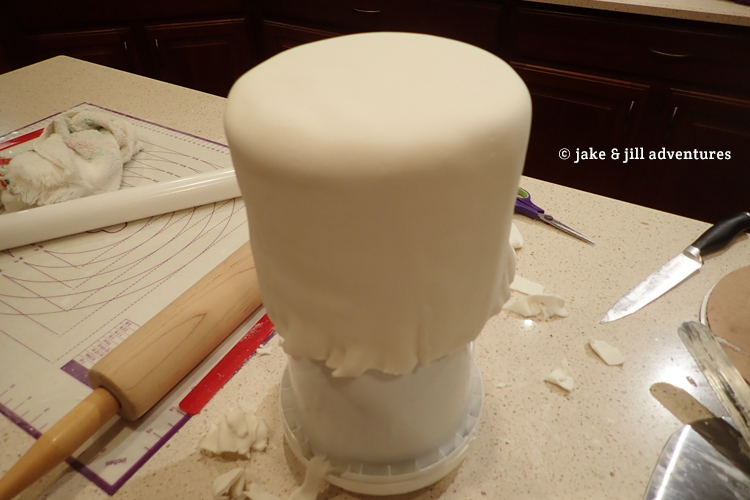
I tried everything from thinning it out to using crisco and even considered bailing on fondant for the top tier. On my 4th attempt I resigned to leaving it however it lay on the cake. It was such a nightmare, but I managed to cover the tier knowing that I’d be able to hide the imperfections on the bottom half of it with my decorations.
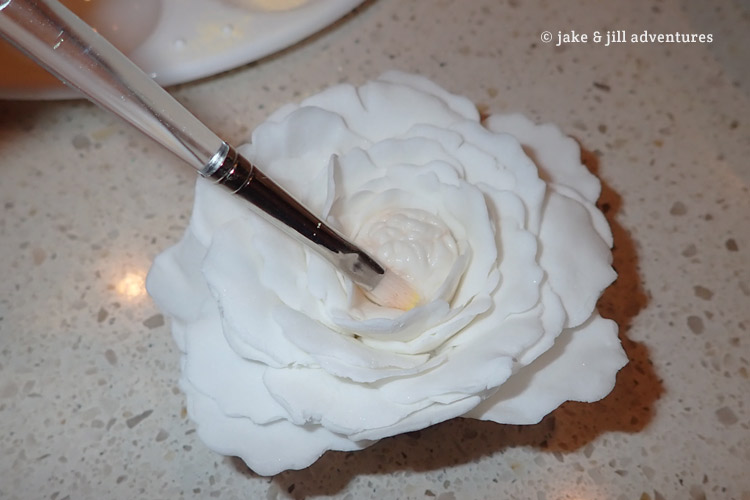
It was after 10PM and I was simply exhausted. 16 hours on my feet and still so much to do. Instead of going to bed like I should have, I stayed up another 3 hours to attempt painting the flowers and leaves. Now I’ve done this only once before, but I did have plenty of different petal dust colors and some grain alcohol (which is used instead of water) to apply color to gumpaste. This is my favorite part of the process, its creative and fun and low-stress. Plus I could sit down.
I worked until 1AM…and felt like a zombie.
Day 5: Friday
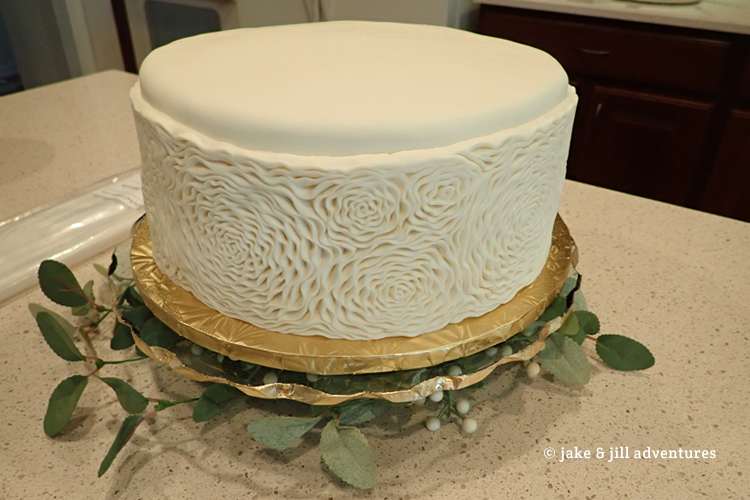
With only 4 hours of sleep, very little food or drink and anxiety about finishing the cake, I was not a happy camper today. At least I’m mentally prepared for the fondant battle that will ensue this morning. Still, its not a great start to my day. Thankfully there turned out to be no battles today. I rolled out my fondant with nothing but crisco (a tip I learned online for this brand) and managed to get it applied in one-go, with minimal cracking and tearing. It wasn’t perfect by any means but much better than yesterday. And besides, I’m covering it with ruffles so it doesn’t really matter.
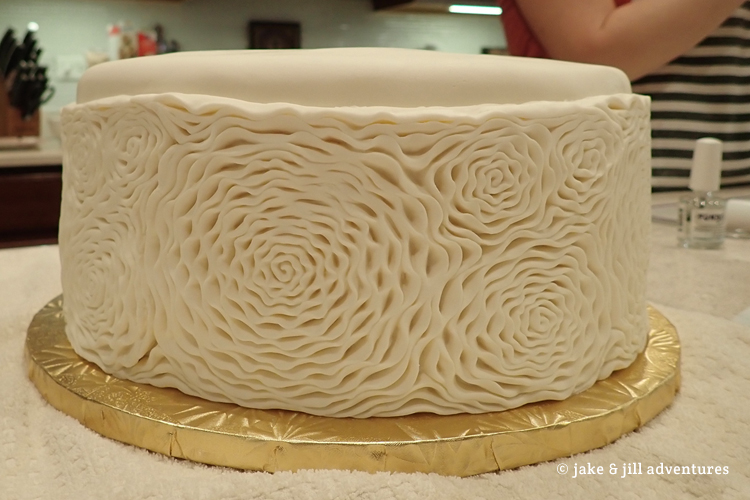
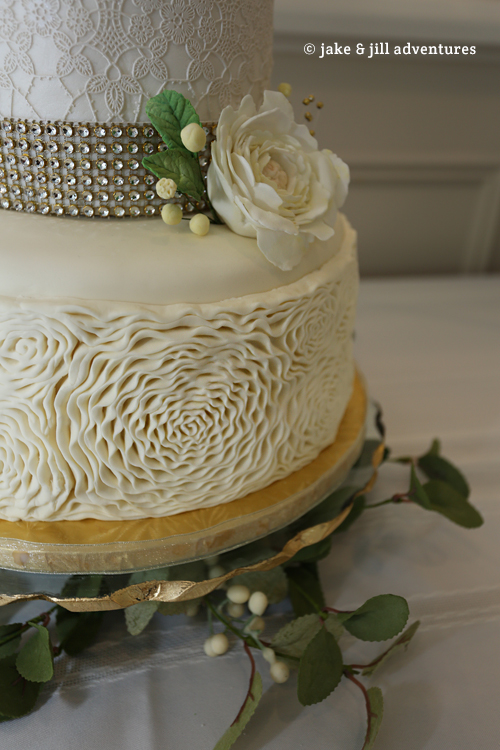
At this point I was worried that I wouldn’t have time to complete my bottom tier ruffles. The process is very tedious and with the knowledge that I don’t have much time, I opted to take a short-cut. I planned for this contingency and utilized a handy tool to help make it go faster; a mold that made my ruffle pattern for me so I don’t have to hand roll and shape each one. I still had to make many panels but at least I know I can get it finished without spending an entire day (which I just don’t have).
This part went off without a hitch, well, other than the fact that I ran out of my ivory fondant with one panel to go. I had a bit more of the white so I made a small batch of ivory, though I know the color didn’t match exactly, I was just pleased to finish this part.
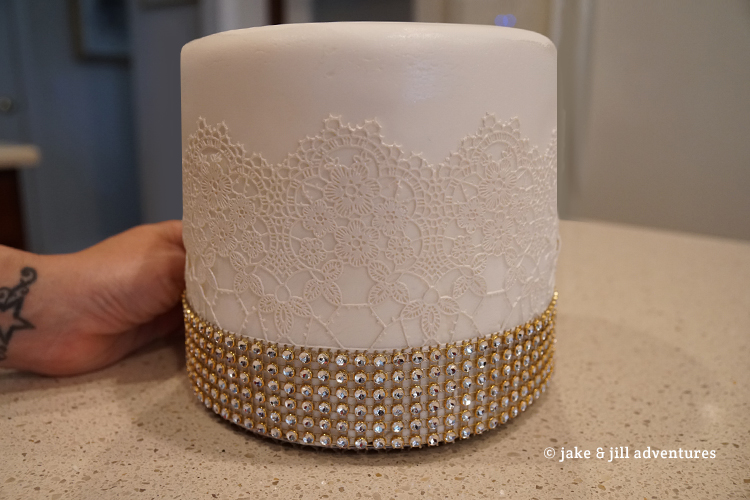
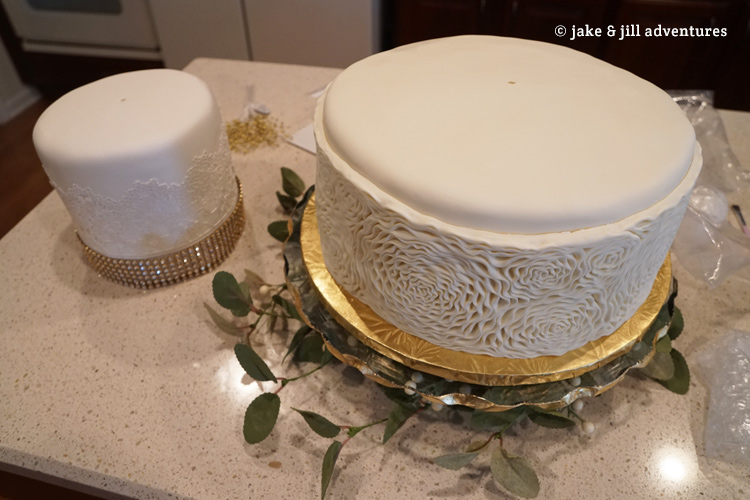
The morning was half over and I still need to finish my topper…though I have no idea how this is going to work. I pushed it aside as I worked on adding the lace to my top tier and the diamond beads around the base. I was so happy to see all the imperfections get covered by these decorations and starting to get excited at the prospect of finishing.
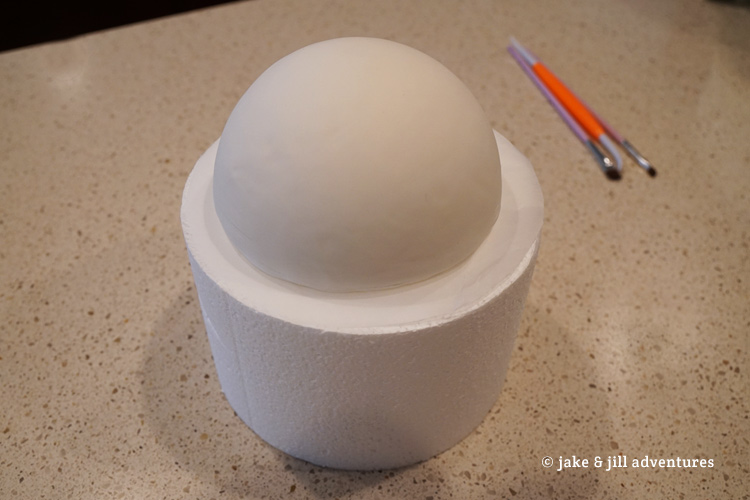
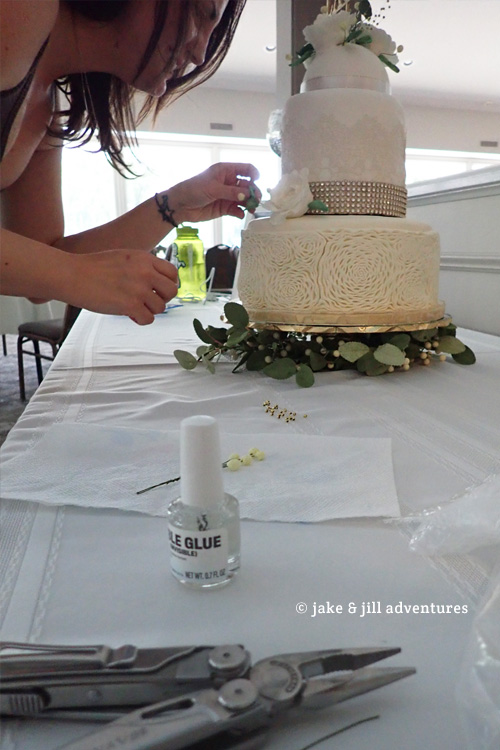
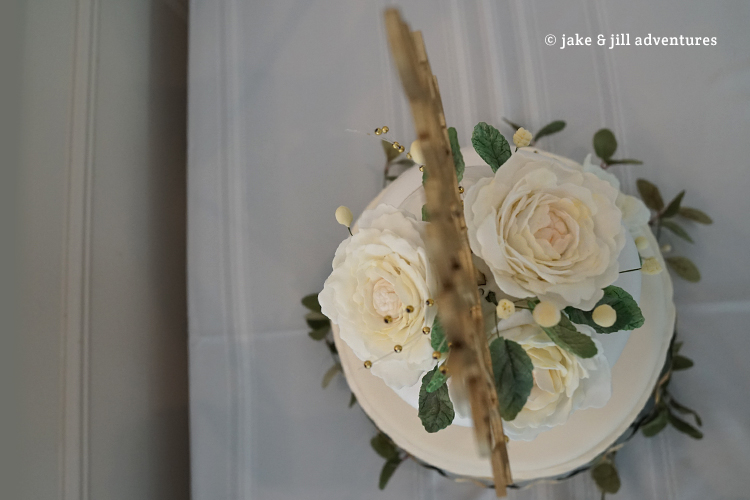
After doing everything else I could think of (doweling my bottom tier for support, finishing the details on the top tier), I couldn’t put off the top any longer. I have all the pieces and no idea how to put them on. At first I was going to use edible glue to stick them on, but realized that the shape of the top wouldn’t hold the flowers up well enough to accomplish the look I was going for. So then I thought that I would build a mound of fondant from which I could adhere the flowers and stick in my leaves and buds. My big problem is I didn’t have enough fondant to do this. So my third idea was to use a half-dome styrofoam piece that is 4.5″ diameter and cover it with fondant and then stick my decorations to it.
Assembling the flowers was a challenge because they wouldn’t stick to the fondant no matter what I tried; edible glue, water, fondant, buttercream. I had to stand there and hold each flower for about 10 minutes before they would stay put enough to add the next. And of course as I’m doing this, I kept breaking off pieces of the petals, even with the aid of my cake steamer to make them more pliable. Eventually I got 3 flowers adhered and felt like that was a good amount for the size and shape of the cake.
Now came the time to add the greenery, which I thought would be easy and fun. When I inserted the first batch, the wire bent and broke. This styrofoam is too thick for the thin wire gauge and it was making it nearly impossible to stick the leaves in by hand. I was getting very frazzled.
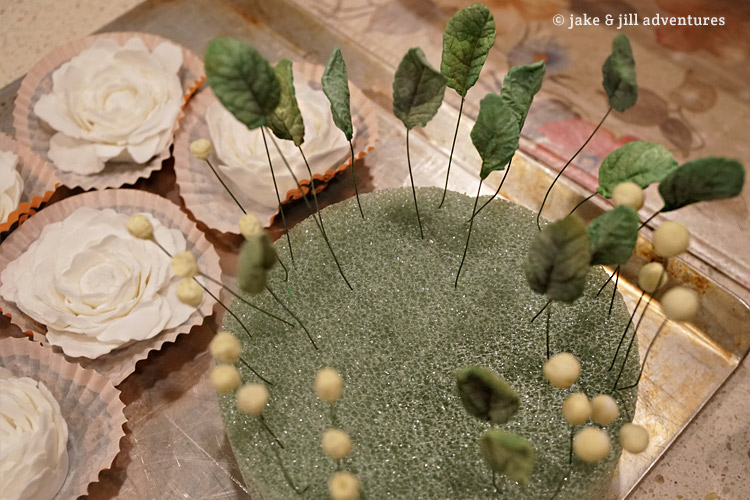
I should have abandoned this and used the all-fondant option but it felt like I’d gone too far and time was running short. So I kept working with this pain-in-the-butt topper, using anything I could find to drill holes in it. Eventually I found a metal skewer that worked pretty well, to insert all my leaves and filler flowers and the gold sign and some sprigs of gold bling.
It wasn’t perfect but I felt it was good enough to work with and I could hide the imperfections on the base (which I made from forcing the skewer into the styrofoam) with ribbon. And now, its done.
Whew…
Okay so its not really finished until its at the venue, but I felt like I had finished. 65-hours of love and labor, I just hope it tastes good.
We had planned to bring the cake over to my cousin’s house that evening, since she is only a few minutes from the venue and is also the one doing most of the party planning. This will give us the chance to get the cakes to the venue early the next day and plenty of time to setup.
Delivery is probably one of the worst parts about caking. We cranked the A-C as high as it goes to mitigate the humidity in the car. Jake had to hold the smaller tier in his lap since it kept sliding around its container and the larger tier could sit perfectly between the front and back seats. I also packed a bin full of decorating gear for assembly (and in case something breaks): cake spatula, cake stand, all of the decorations, hot glue gun, cake steamer, a bunch of smaller spatulas and extra edible materials. Basically anything I could think of that would be handy.
I took the drive very slow and steady, making sure to not ever slam on breaks or accelerate too quickly. And when we pulled up to my cousin’s house and got the cakes in their nest for the evening, we could finally take a breath of relief!
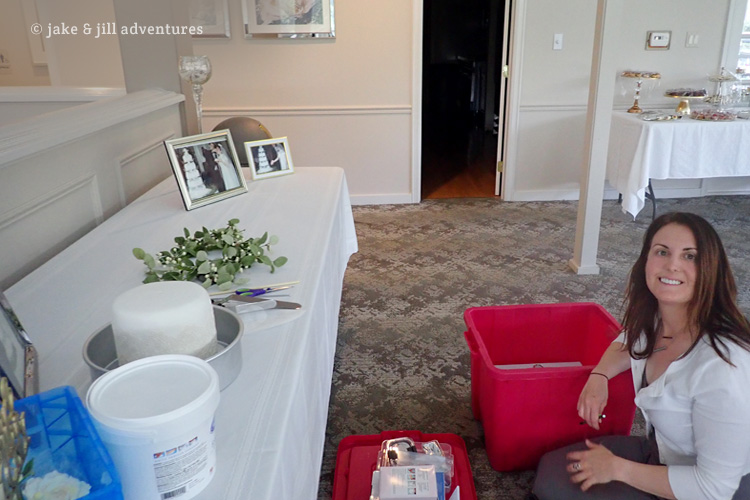
Day 6: Friday, D-DAY
Today is the big day! I felt great considering how far we’ve come and everything looks to be holding together nicely. Jake and I went to the venue many hours ahead of time to set up. With no one else here I could take my time and make sure everything came together smoothly.
I haven’t ever stacked cakes in real life which was scary. The top tier wasn’t crazy heavy, but still I didn’t know if I doweled the bottom tier correctly and didn’t want to have a cake disaster before anyone could see it. Thankfully it all went up without issue and the final decor pieces really brought it to life. I had some extra flowers and greenery which I decided to incorporate into the bottom tier, and it ended up tying the whole design together.
Not bad for my first real cake.
Final Cake:


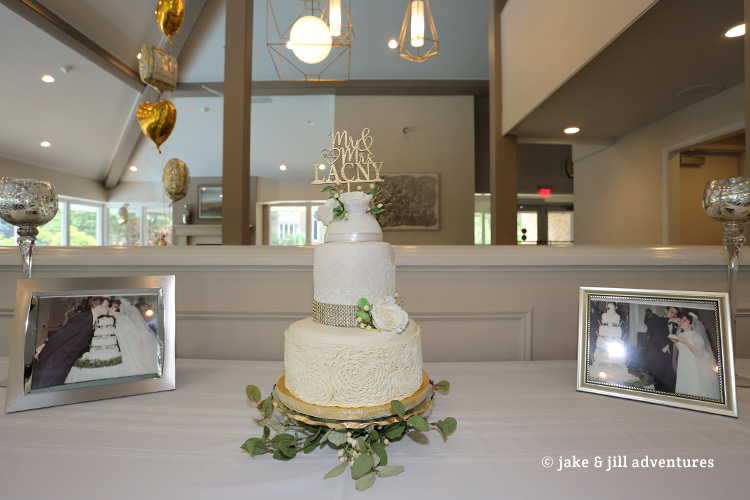
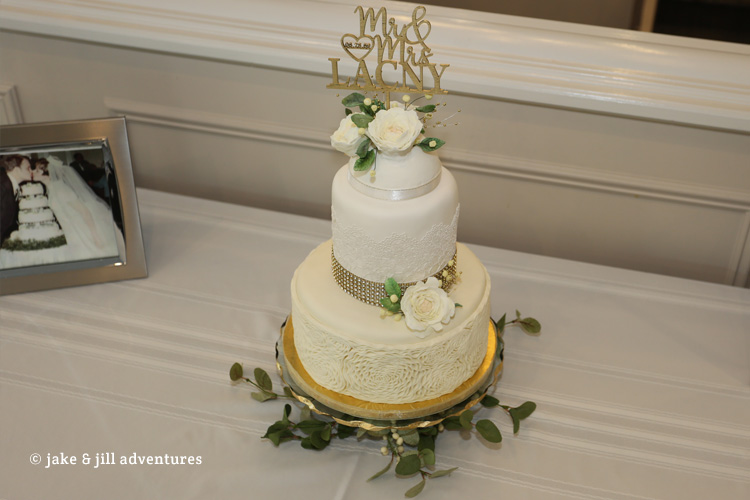
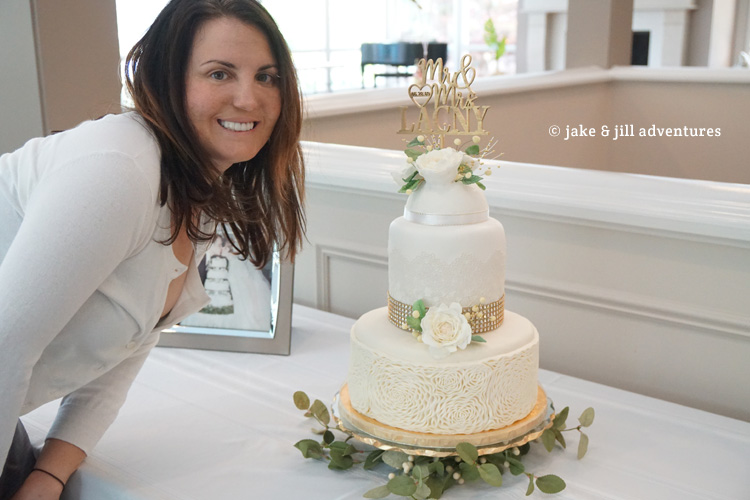
Everyone was thrilled with the design, especially my aunt and uncle. That is the most important thing to me! That the client loves it.
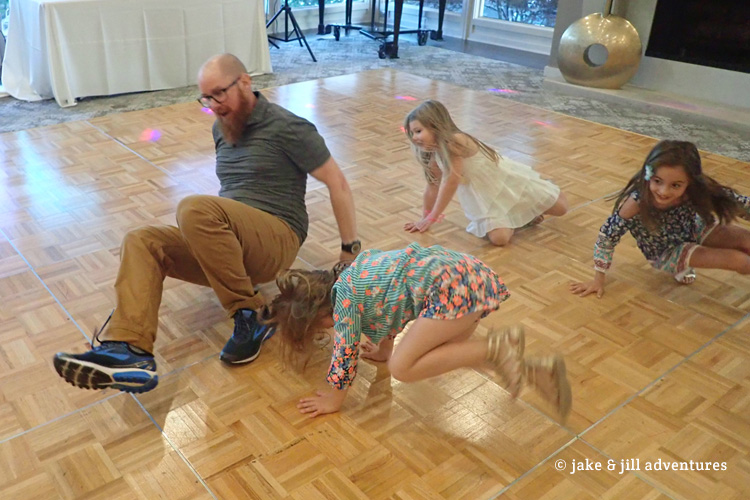
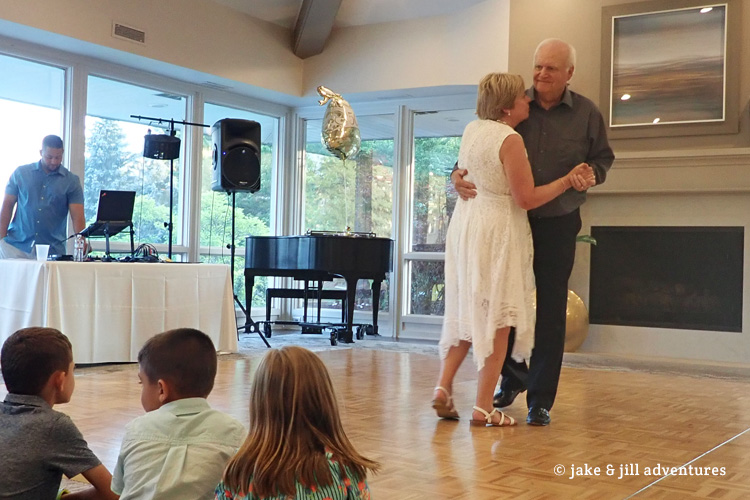
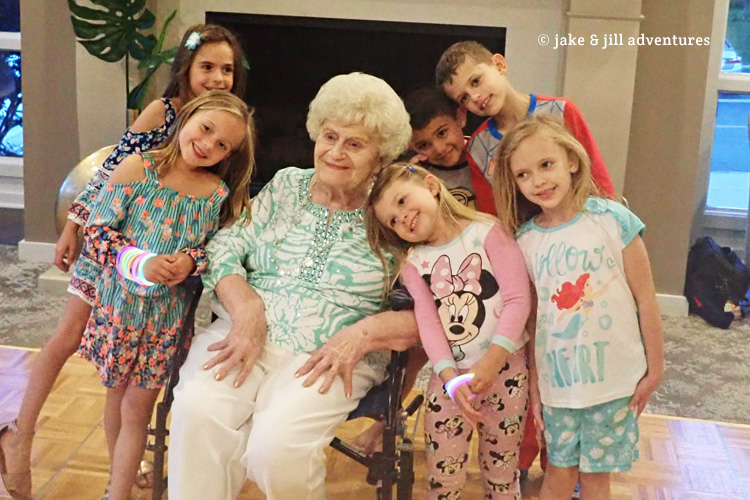
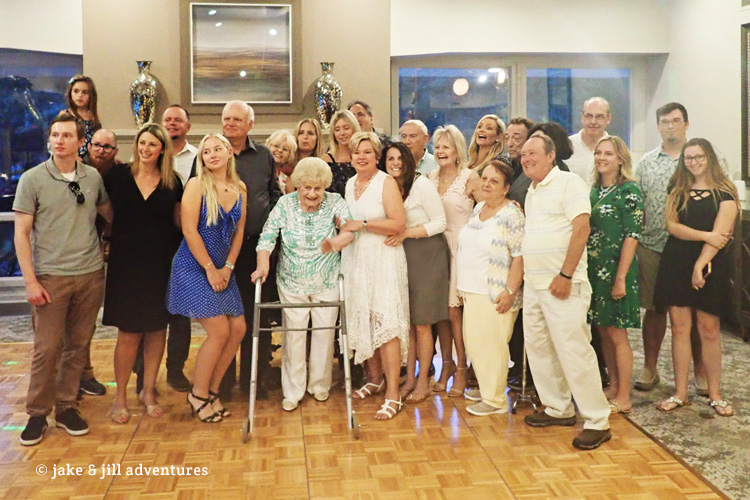
The night was full of fun and dancing and it was so awesome to see my whole family in celebration of this momentous occasion. Some highlights included Jake teaching all the kids to breakdance (and showing off his awesome old-school moves) and seeing my 96-year-old grandma stand up to dance with our whole family.
I wanted to cut the cake at first, mostly since I just wanted to learn how to do it. I actually made some paper templates with approximate sizes to cut each piece. Turns out I am terrible at cutting cake. One of my cousins helped out, but our pieces ended up very messy and GIGANTIC. Thankfully the caterers stepped in to save the day, taking less than a couple of minutes to get perfect slices. Its clear they do this for a living.
I was so happy with the flavors, they all worked so well together. I am overly-critical and could pick apart some things that I wanted to do differently, but everyone else was blown away by the taste and that made me so happy. And more importantly, I’m so glad that its over. I probably bit off more than I could chew, even with the wonderful support of Jake and my parents, I learned a ton and if I had to do it all over again, I could probably shave off 20 hours from the top.
Happy 50th Anniversary Aunt Eileen and Uncle Paul. Now Let’s Eat Cake!


Jill, I cannot BELIEVE how much work and planning you put into this cake! WOW!!! I am gobsmacked!!
Thanks Steve! It was a doozy of a project for sure. I never feel like anything I do creatively is finished but time dictated this one for me 🙂